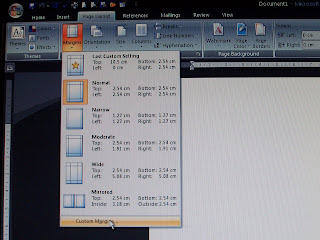
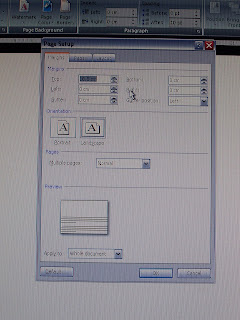
1. Open word and change the page layout to landscape, change the margins to 0 with the exception of the top margin which you change to the height you want your book to b
2. Click on insert picture and choose which background you want to use, stretch the background to cover your chosen page size.


2. Click on insert picture and choose which background you want to use, stretch the background to cover your chosen page size.

3. Click on insert word art and in the text box type the letter you want as the first letter of your book (e.g. A for Adam) change your font to one that you want and your size to the largest size available. Your background will probably disappear at this point but don’t worry we will fix this. You need to format your word art now so either right click and go to format or go to your format tool on your tool bar. Change your text wrapping to through and this should bring your background back. Click on the background and format again this time sending it back, this will bring your word art letter to the front over your backing paper.


4. Resize the letter so that the top of the letter runs against the top of your backing paper and then at the bottom leave a small gap between the bottom of your letter and the bottom of your background unless you have a borderless printer.


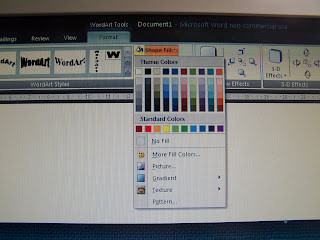
5. I now format the word art again to change the thickness of the outline around the letter, to do this I change the weight to 4pts, I choose to leave my letter unfilled but this is down to personal preference and you can fill or change the weight of the line to what you want, It is possible to add a picture from your files in your word art should you wish. 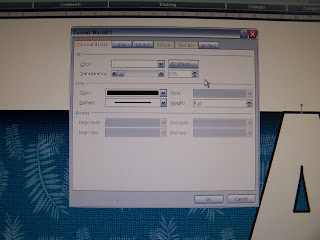


6. Save and Print your page now, then go back and right click on your letter and go to edit text, type in the next letter you need, making sure not to edit anything else and print. Do this for each remaining page in my case, D,A, M. if you wish to have each page on a different background just follow the steps from 2 through again for each page.
7. When all your sheets are printed carefully trim the top, bottom and left edges around the background. When that is done carefully trim around your letter making sure you leave the left side uncut so that it remains attached to your background, do this for each letter.


8. Now it is time to decide on your layout, put your pages into order and decide how you want your pages to overlap, secure in place with a clamp or bulldog clip, then trim to the required length making sure all of the pages now end at the same place.


9. Score a line about 1.5 cm from the left side of each page so your card opens properly and secure together using brads, ribbon, tape or anything else you wish, then decorate .
Thank you for this, I have borrowed this idea and am in the middle of making fathers day cards with it, one for my OH, one for my dad and one for FIL.
ReplyDeleteGreat blog
Claire